
A table saw sled is a versatile woodworking jig that enhances precision, safety, and efficiency when making crosscuts․ With countless DIY plans available, you can customize a sled to fit your needs, skill level, and budget, ensuring accurate and repeatable cuts every time․
What is a Table Saw Sled?
A table saw sled is a custom-built jig designed to enhance precision and safety when making crosscuts on a table saw․ It typically consists of a flat platform with fences and runners that glide smoothly along the saw’s surface․ This tool is especially useful for cutting large panels, repetitive pieces, or angled cuts, ensuring consistent results․ Unlike relying on the miter gauge, a sled provides better control and reduces the risk of kickback․ Many woodworkers opt to build their own sleds using plans, allowing for customization to fit specific needs, such as adding T-tracks for adjustable stops or zero-clearance inserts for cleaner cuts․ A well-made sled becomes an indispensable asset in any woodworking shop․
Why Build a DIY Table Saw Sled?
Building a DIY table saw sled offers numerous advantages, primarily cost savings and customization․ Store-bought sleds can be expensive, while DIY plans allow you to create a sled tailored to your specific needs and budget․ With basic tools and materials like plywood, MDF, and hardware, you can construct a sled that enhances your table saw’s functionality․ A DIY sled also lets you incorporate unique features such as adjustable stops, T-tracks, and zero-clearance inserts, improving precision and versatility․ Additionally, building your own sled is a rewarding project that hones your woodworking skills․ Whether you’re a hobbyist or a professional, a custom sled can streamline your workflow, making repetitive cuts safer and more accurate, thus elevating your overall woodworking experience․
Benefits of Using a Table Saw Sled
A table saw sled significantly enhances your woodworking experience by providing cleaner, more accurate cuts and improving safety․ It allows for better control when cutting large panels or small parts, ensuring consistently square results, which is crucial for tight joinery and professional-looking projects․ By eliminating the need to slide workpieces manually across the saw table, a sled reduces the risk of accidents and keeps your hands away from the blade․ Additionally, it enables repeatable cuts with precision, making it ideal for production work․ The sled also accommodates advanced features like adjustable stops and zero-clearance inserts, further increasing its versatility․ Whether you’re a hobbyist or a professional, a table saw sled is an essential tool that elevates both the quality and efficiency of your woodworking projects․

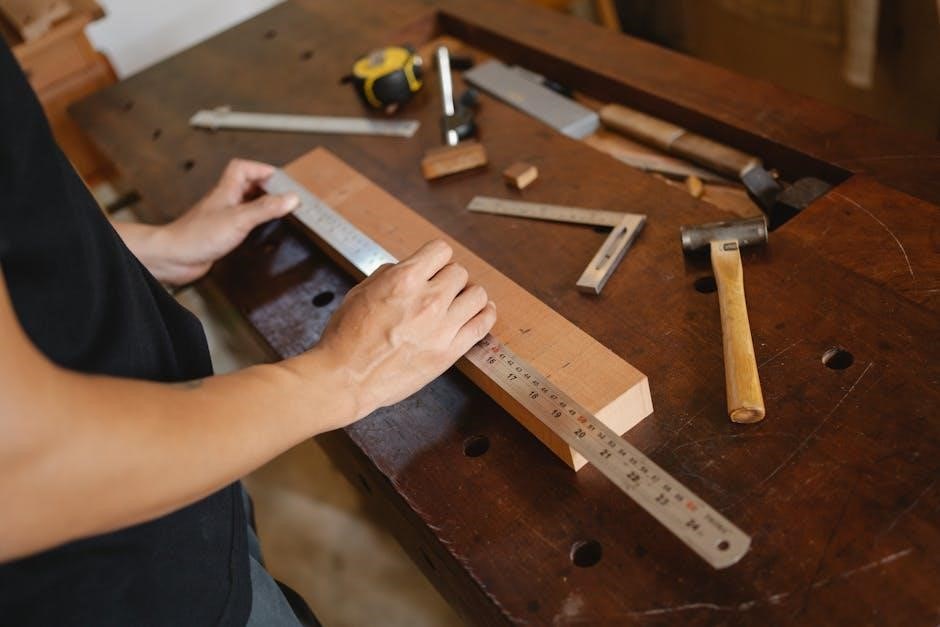
Essential Tools and Materials Needed
Gather a table saw, drill, router, and basic woodworking tools․ Materials include MDF, plywood, screws, and hardware like T-tracks․ Proper preparation ensures a functional and durable sled․
Tools Required for the Project
Building a table saw sled requires essential tools like a table saw for precise cuts, a drill for screwing components together, and a router for creating smooth edges․ Additional tools include a measuring caliper for accuracy, clamps to hold pieces in place, and a carpenter’s square to ensure everything is aligned properly․ A screwdriver or drill/screw gun is necessary for assembling the sled․ Depending on the design, you might also need a hacksaw or countersink drill bit․ Having all these tools readily available ensures the project progresses smoothly and efficiently․
Materials Needed for the Sled
The primary materials for building a table saw sled include medium-density fiberboard (MDF) or plywood for the base, which provides a smooth, flat surface․ Hardwood or 2×4 lumber is often used for the fences and supports, offering durability and stability․ T-tracks and zero-clearance inserts are optional but highly recommended for enhanced functionality and safety․ Additional materials like wood glue, screws, and hardware kits are essential for assembling the components securely․ Depending on the design, you might also need PVC rails or other materials for runners to ensure smooth operation on the table saw․
Hardware and Accessories
Essential hardware for a table saw sled includes T-tracks and zero-clearance inserts to ensure smooth operation and prevent material waste․ Adjustable stops and flip stop blocks are popular additions, allowing for precise, repeatable cuts․ Many plans incorporate hardware kits that include screws, brackets, and clamps to secure components․ For enhanced functionality, consider adding PVC rails or UHMW tape to the runners for reduced friction․ Optional accessories like hold-downs or miter bars can further improve control and safety․ These components are readily available at hardware stores or online, making it easy to customize your sled to meet specific woodworking needs․

Step-by-Step Guide to Building a Table Saw Sled
Cut materials to size, assemble the base, and attach fences and runners․ Ensure accuracy by checking squareness and proper alignment․ Follow detailed plans for a precise, functional sled․

Preparing the Base

Start by cutting your base material, such as plywood or MDF, to the desired size using a table saw or circular saw․ Sand the surface to ensure it’s smooth and even․ Next, cut a zero-clearance slot in the center of the base to guide the saw blade, using a dado blade for precision․ Attach T-tracks or runners along the edges for smooth movement across the table saw․ Ensure the base is square by checking its alignment with the saw’s fence․ Secure all components firmly and test the base for stability and accuracy before proceeding to the next steps․
Constructing the Fences
Begin by selecting durable materials like plywood or MDF for the fences․ Cut the front and rear fences to size using a table saw or miter saw․ Assemble the fences by gluing and screwing them to the base, ensuring they are square and aligned with the zero-clearance slot․ Use clamps to maintain proper alignment during assembly․ For added stability, attach T-tracks to the fences to accommodate adjustable stops or flip stops․ Sand all edges for a smooth finish․ Ensure the fences are level and securely fastened to prevent any movement during use․ This step is critical for maintaining accuracy and safety when making precise crosscuts․
Attaching the Runners
Attaching the runners is a critical step in ensuring the sled slides smoothly on the table saw․ Cut the runners from durable materials like PVC or metal, ensuring they fit snugly in the table saw’s miter slots․ Measure the width of your table saw to determine the correct runner length․ Attach the runners to the sled’s base using wood glue and screws, ensuring they are evenly spaced and aligned․ Use clamps to hold them in place while the glue dries․ Sand the runners for a smooth finish and test the sled’s movement to ensure it slides effortlessly․ Properly attached runners are essential for maintaining accuracy and preventing wobble during cuts․
Ensuring Accuracy and Squareness
Accuracy and squareness are paramount for a functional table saw sled․ Start by using a carpenter’s square to verify that the sled’s fences are perfectly aligned with the base․ Clamp the fences in place and ensure the sled slides smoothly without wobble․ Use test cuts to check for squareness, adjusting the fences if necessary․ Sand all surfaces to eliminate any friction or unevenness․ Double-check the alignment of the runners with the table saw’s miter slots to prevent misalignment․ Properly ensuring accuracy and squareness guarantees precise cuts and enhances the sled’s overall performance, making it a reliable tool for your woodworking projects․

Advanced Features for Customization
Enhance your table saw sled with T-tracks, zero-clearance inserts, and adjustable stops for improved versatility․ These features allow for precise cuts, repeatable results, and enhanced functionality, catering to advanced woodworking needs․
Incorporating T-Tracks and Zero Clearance Inserts

Incorporating T-tracks and zero-clearance inserts into your table saw sled significantly enhances its functionality․ T-tracks provide a secure and adjustable mounting system for accessories like stop blocks and hold-downs, ensuring precise control over your cuts․ Zero-clearance inserts, on the other hand, eliminate tearout by maintaining consistent blade-to-material contact․ Together, these features allow for cleaner, more accurate cuts and improve overall safety․ By integrating these elements, you can customize your sled to handle a variety of tasks, from crosscuts to angled cuts, with ease and precision․ This customization ensures your sled adapts to your woodworking needs, making it an indispensable tool in your workshop․
Adding Adjustable Stops
Adjustable stops are a valuable addition to any table saw sled, offering precise control over repetitive cuts․ These stops can be positioned anywhere along the sled’s fence, allowing you to make consistent cuts without measuring each time․ By securing the workpiece firmly against the stop, you ensure accuracy and reduce the risk of human error․ Adjustable stops are particularly useful for projects requiring multiple identical pieces, such as building cabinets or furniture․ They save time and enhance efficiency, making them a practical feature for both novice and experienced woodworkers․ This customization ensures your sled becomes a versatile and reliable tool for a wide range of woodworking tasks․
Implementing a Flip Stop Block
A flip stop block is a practical addition to a table saw sled, allowing for quick and precise adjustments between different cut lengths․ This feature is especially useful when making multiple cuts of varying sizes, as it eliminates the need to reposition the sled entirely․ The flip stop can be easily toggled up or down, providing a secure reference point for consistent results․ Constructed from durable materials like MDF or plywood, the flip stop is typically attached with screws or bolts, ensuring stability and longevity․ By incorporating this feature, woodworkers can save time and maintain accuracy, making it an essential upgrade for any sled design․ The flip stop block enhances versatility and efficiency, catering to projects requiring numerous precise cuts․
Safety and Best Practices
Safety is crucial when using a table saw sled․ Always ensure proper alignment, use hold-downs to keep hands away from the blade, and maintain the sled regularly․ Follow safety guidelines to prevent accidents and ensure precise cuts․

Safe Operation of the Table Saw Sled
Safe operation of a table saw sled requires attention to detail and adherence to best practices․ Always ensure the sled is properly aligned with the saw’s blade to prevent binding or kickback․ Use hold-downs or clamps to secure the workpiece, keeping your hands well away from the cutting area․ Maintain a clean and clear workspace to avoid accidents․ Before each use, inspect the sled for damage or wear, and ensure all runners glide smoothly․ Never operate the sled without proper safety gear, including eye protection․ By following these guidelines, you can maximize safety and achieve precise, professional-quality cuts consistently․
Common Mistakes to Avoid
When building and using a table saw sled, several common mistakes can hinder performance and safety․ One major error is improper alignment of the sled’s runners with the saw’s miter slots, leading to uneven cuts․ Another is using insufficient clamps or hold-downs, which can cause the workpiece to shift during cutting․ Neglecting to check the sled for squareness before use is another oversight, as it can result in inaccurate cuts․ Additionally, using damaged or warped materials for the sled’s construction can compromise its stability and precision․ To avoid these issues, ensure meticulous assembly, regular maintenance, and thorough pre-use inspections to maintain the sled’s accuracy and reliability․ These precautions will help you achieve consistent, professional-quality results while ensuring a safe working environment․
Building a table saw sled is a rewarding project that significantly enhances the functionality of your table saw․ With the right plans and basic tools, you can create a custom sled tailored to your woodworking needs․ It improves accuracy, safety, and efficiency, making it an essential tool for both beginners and experienced woodworkers․ By following step-by-step guides and incorporating optional advanced features, you can achieve professional-quality cuts consistently․ Remember to avoid common mistakes, such as improper alignment and insufficient clamping, to ensure optimal performance․ Whether you’re working on small parts or large panels, a well-made sled will become a trusted companion in your workshop, helping you take your projects to the next level with ease and precision․